
So here is how we fix them...
For headlights that are not very damaged, follow STAGE 1
For headlights with apparent mild damage, follow STAGE 2
For headlights with major damage, follow STAGE 3
STAGE 1
For headlights that are not very damaged, follow STAGE 1
For headlights with apparent mild damage, follow STAGE 2
For headlights with major damage, follow STAGE 3
STAGE 1
Wash your clear lenses.
Completely dry with towel.
Polish them by hand using a microfiber towel and Meguiar's Plastx.
To keep from future yellowing, apply a wax or a headlight protectant wax.
Completely dry with towel.
Polish them by hand using a microfiber towel and Meguiar's Plastx.
To keep from future yellowing, apply a wax or a headlight protectant wax.
STAGE 2
Completely wash your yellowing lenses.
Completely dry with towel.
Completely dry with towel.
Tape off the paint around the headlight so you don't damage it. Opening the hood will make it easier.

Once the paint has been taped off you will now need to wet sand the lenses. To wet sand, make sure you use 2000 grit sand paper. (you can also start with 1000 grit sand paper and then 2000 grit to remove slight damage quicker)
Wet sand means sanding with the sand paper that is wet at all times.
Wet sand means sanding with the sand paper that is wet at all times.


After the lenses have been sanded you must polish them to perfect clarity. To do this, we will need a drill, Mother's power ball, and Meguiar's PlastX.


Attach the power ball to the drill and apply PlastX to the lens, polish until the lens is completely clear. When finished the lenses will look brand new and allow the light to completely shine through.

STAGE 3
Completely dry with towel.
Tape off the paint around the headlight so you don't damage it. Opening the hood will make it easier.
 Wet sand the lenses.
Depending on how damaged they are you may need to start with a grit as low as 500 and work your way up, but where you start is up to you and depends on damage.
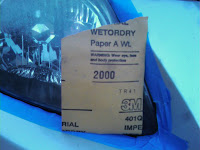

Available sandpaper grits:
500
600
800
1000
1200
1500
2000
2500
3000
Wetsand in only one direction for every grit.
For example, 500 grit left to right, 600 grit up and down, 800 grit left to right, and continue alternating until you are done.
You are finished with a grit level when the scratches are all going in one direction.
Because you have had to remove a bit of material to fix your damaged lights, we will not be polishing them, but instead degreasing and applying a coat of UV protectant clear coat paint.
Duplicolor Headlight Restoration Kit HLR100 :
 This kit contains both the degreaser polish and UV protectant paint.
The reason we don't need to polish is because we are using paint and the paint will fill the fine scratched left behind and also provide something for the paint to attach to.
The end result will be completely clear and brand new looking.
Follow the directions in the kit.
All information is advise and I am not responsible for what you do on your own.
Depending on how damaged they are you may need to start with a grit as low as 500 and work your way up, but where you start is up to you and depends on damage.
500
600
800
1000
1200
1500
2000
2500
3000
Wetsand in only one direction for every grit.
For example, 500 grit left to right, 600 grit up and down, 800 grit left to right, and continue alternating until you are done.
You are finished with a grit level when the scratches are all going in one direction.
Because you have had to remove a bit of material to fix your damaged lights, we will not be polishing them, but instead degreasing and applying a coat of UV protectant clear coat paint.
Duplicolor Headlight Restoration Kit HLR100 :

The reason we don't need to polish is because we are using paint and the paint will fill the fine scratched left behind and also provide something for the paint to attach to.
The end result will be completely clear and brand new looking.
Follow the directions in the kit.
All information is advise and I am not responsible for what you do on your own.


 (some use a
  but they don't work as good)


